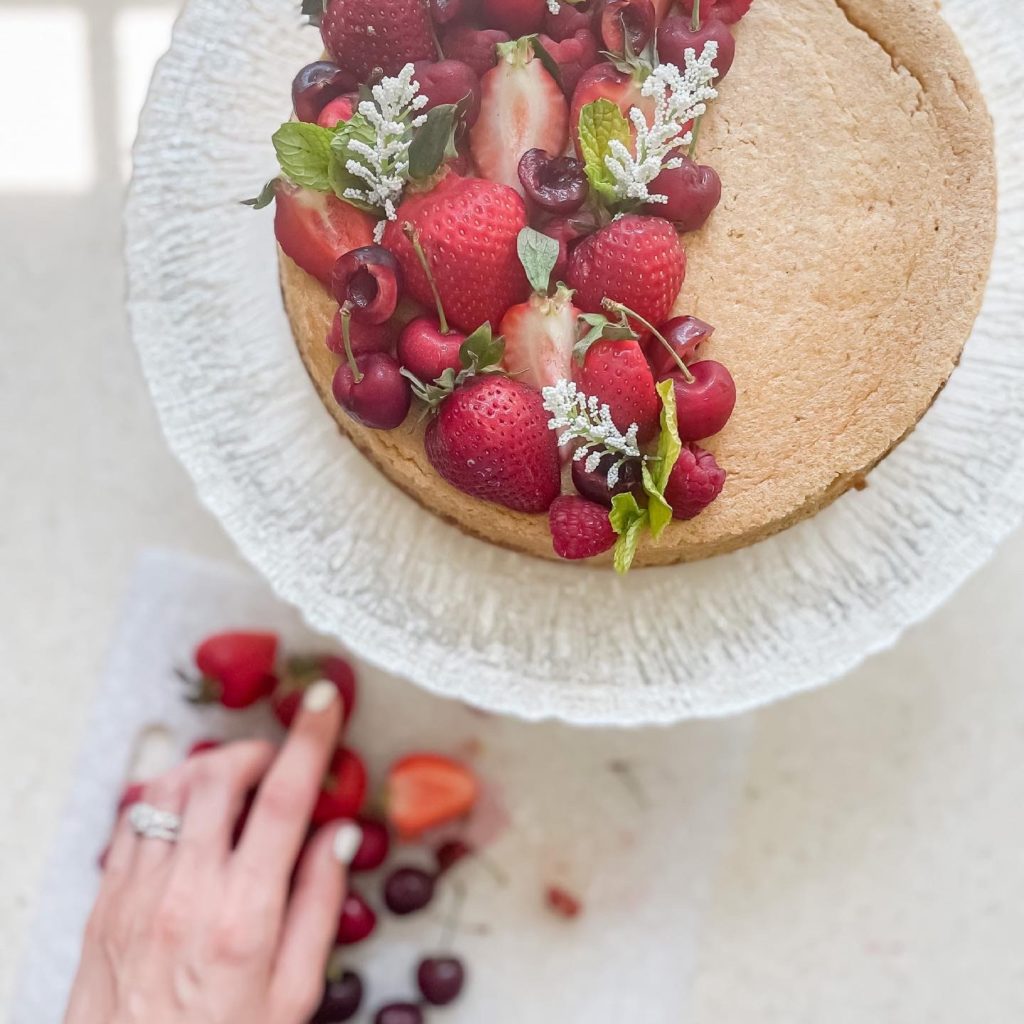
It all started when I baked a cheesecake with a big ol’ crack right down the middle. I was getting ready to pass it along as a contribution for a celebration and thought, “There is no way this crowd will let me get away with a crack in my cheesecake.” So I scoured the fridge for some fresh produce, chopped, placed, and arranged it to cover the crack, stepped back and thought, “Wow, this actually took a basic cheesecake to the next level.” So many times in my journey to becoming a better home chef, I have found that the most elegant, beautiful, and noteworthy, statement food displays are those with the simplest techniques.
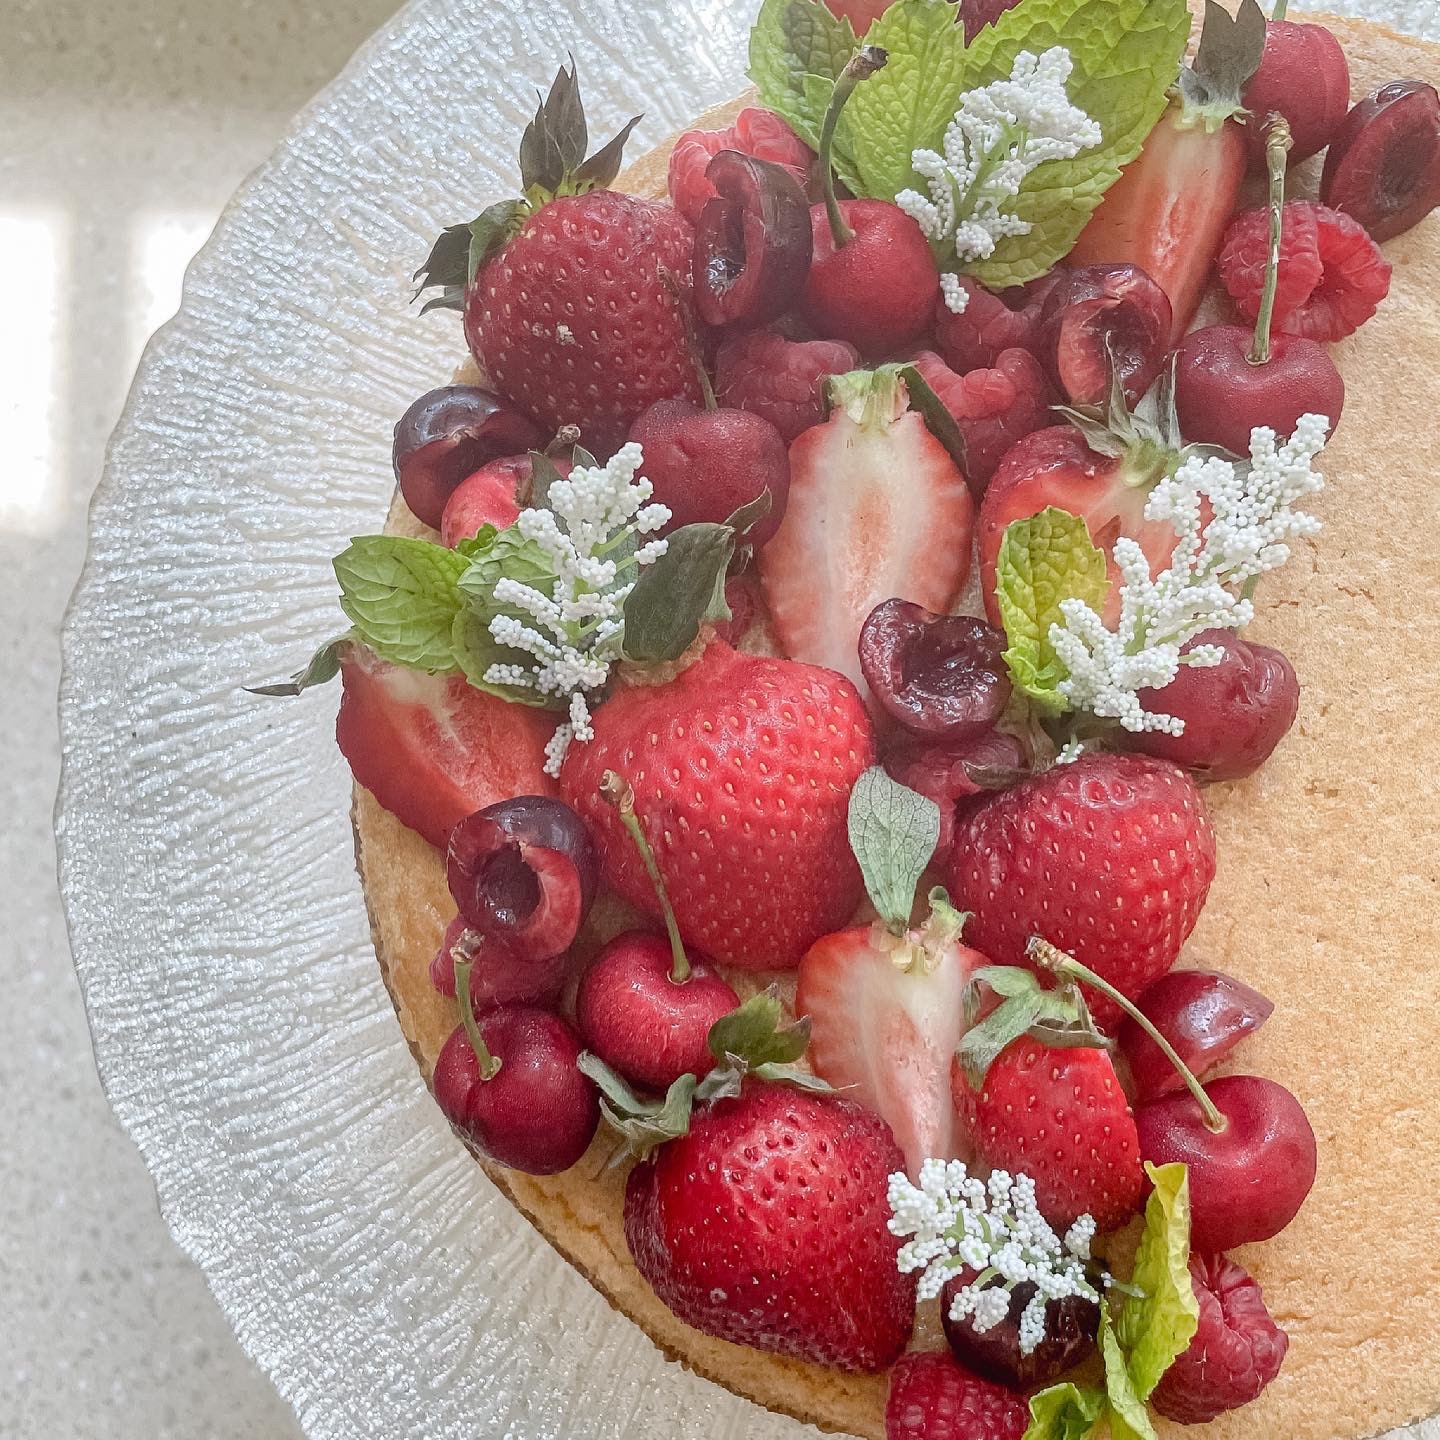
Whether you are making a pound cake, buying an angel food cake, or even planning to serve a traditional cheesecake, you can take a dull-looking dessert and make it effortlessly gourmet in just a few simple steps. With the change of season to summer comes lighter fare. With fresh, in-season fruit easily accessible, here’s how to spruce up any simple cake to make it celebratory, decadent, and a decorative addition to any tablescape. The cheesecake below was made for Lauren Mcbride Blog and quickly became the inspiration for this post @laurmcbrideblog paleo cheesecake! It reminded me once again how, without any complicated technique and often what you already have on hand, it can come together to bring added celebration to your table. Here’s where to start. ⠀⠀⠀⠀
Pick 3 ingredients that compliment each other in color.
The beauty of using a simple dessert as a base is that the topping can lead it in any flavor direction you choose. For example, with a cheesecake as a base, you can choose to load it up with chocolate for a rich flavor profile OR go the route of produce for a light, seasonal flare. Whatever direction you desire to go, pick three items and make sure they complement each other in color. Here are a few pairing ideas:
Chocolatey:
- Brownie Pieces
- Mini Chocolate Chip Cookies
- Candied Pecans
Classic Summer Fruit:
- Strawberries
- Raspberries
- Cherries
Tropical Fruit:
- Mango
- Pineapple
- Kiwi⠀⠀⠀⠀⠀⠀
Leave half of them whole, cut the other pieces in half.
Often when the everyday host tries to plate food, we stick with one size. However, what happens is that without variation, the design looks stale. To add some effortlessly dynamic character, take each of the ingredients you selected and leave some whole (e.g. whole strawberries) and the other half simply cut in half. If you are working with brownies for example, the same technique can carry over. Leave half of them in a whole (mini) brownie size, while cutting the other pieces into halves for some variety. Another note as you are cutting is to leave any natural stems and greens as much as possible. ⠀⠀⠀⠀⠀⠀⠀⠀
Place the whole pieces first! Work biggest to smallest!
Now it’s time to start designing. First decide if you would like to just cover half of the surface of your dessert, just a crescent shape, or the whole top surface. If you take a peek at the dessert I prepared, you will see that I chose to cover half of the cheesecake (my go-to move.)
Once you’ve decided, you will begin by placing the whole pieces throughout the working area. Using my picture as an example, I placed the strawberries, filled in with the raspberries, then cherries. Work through one ingredient at a time, until all the whole pieces are covering the top. The amount of each will depend on your working area.⠀
Finish it off with simple, elegant detail!
You should have some gaps left where you can see the base of your dessert. To fill in these spaces, you are going to go through and scatter the halves that you prepared. The best you can, try to balance color and variety. You can use my picture as an example of mixing fruit along the way. Move forward with this until you have a solid design and no longer can see the base.
While you should definitely like the way the dessert looks at this point, I find that this next step brings it all together in a stunning way. I like to use mint on my desserts along with simple fake flowers that I keep on hand from a local craft store. Alternatively, you can use food safe flowers from your garden.
Note: mint wilts quickly! Start by trimming the herbs and flowers to be uniform, approximately three inch pieces. Put the flowers and herbs together in little clusters and scatter them amongst the fruit! You will see that I picked a few places across my working area to place them. As you place this final touch, you will see how it truly brings the whole design together!⠀⠀⠀⠀⠀⠀⠀
Easy enough, right? Here’s to confidence, as you take a well-loved basic dessert base and intentionally top it with ease for simple, intentional, beautiful decadence☀️.
back to top
